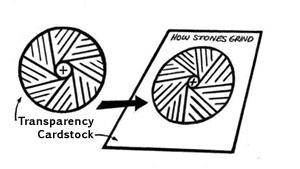
- Students will create a model that demonstrates how stones grind.
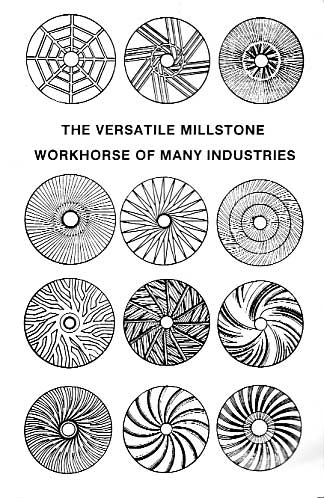
- Students will compare millstone patterns to identify how the grain is turned into flour as it runs from the central hopper to the perimeter.

How Millstones Grind
Robert P. Rich and Steven A. Walton
Learning Objectives
Background
 In order for a millstone to cut the grain into flour - for that
is exactly how grain is ground - the millstone faces need to
have grooves cut into them. The pattern of these grooves
varied from stone to stone and from region to region, and stone
dressers developed both elaborate and subtle variations for different
grains, different grinds (much like the range of grinds of coffee
available today), and different grain conditions. The patterns
on the stones working together act like a pair of scissors to
cut the grain as the stones rotate.
When we speak of a grindstone, we can either
mean each of the pair or the two together, for you must have
a pair to do any useful grinding. The bottom stone is called
the bedstone and it remains stationary - in fact, it is set into a bed of
concrete or mortar to make it literally rock stable. The top, rotating stone
is called the runner stone, and it has a hole in the middle through which
the grain is fed. Both stones have a pattern of grooves cut into their working
faces (top face for the bedstone and bottom face for the runner stone) that
act as feed channels for the flow of the grain to the outside edge. As the
two stones rotate against one another - never touching! - the
grain is repeatedly scissored between the grooves, whose gap varies from
well less than 1/8" near
the center down to thousandths of an inch at the perimeter. Individual grains
are cut again and again on their journey from the center out to the edge.
A stone dresser would come to the mill once a year and re-face the stones
to keep the grooves crisp and the stones milling smoothly through the year.
 For more information on the patterns in millstones, see Jon A. Sass, The
Versatile Millstone: Workhorse of Many Industries (SPOOM, 199), available
directly from SPOOM.
Materials
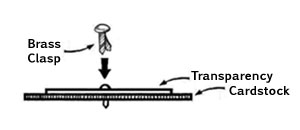
For each model of a millstone pattern, you will need the following:
Instructions
 
Questions
Return to:
Educational Projects
 |
||||||

|


